

How to Add Multi Column Classes to Registration Forms
With WP User Frontend (WPUF) Free 2.9.0, you can arrange form fields in multiple columns to enhance the appearance and user experience. This feature applies to both Post Forms and Registration Forms.
How to Arrange Form Fields in Columns
Section titled “How to Arrange Form Fields in Columns”Step 1: Open or Create a Form
Section titled “Step 1: Open or Create a Form”- Navigate to WP User Frontend in your WordPress dashboard.
- Open an existing Post or Registration Form, or create a new one.
Step 2: Enable Multi-Column Layout
Section titled “Step 2: Enable Multi-Column Layout”For a 2-Column Layout
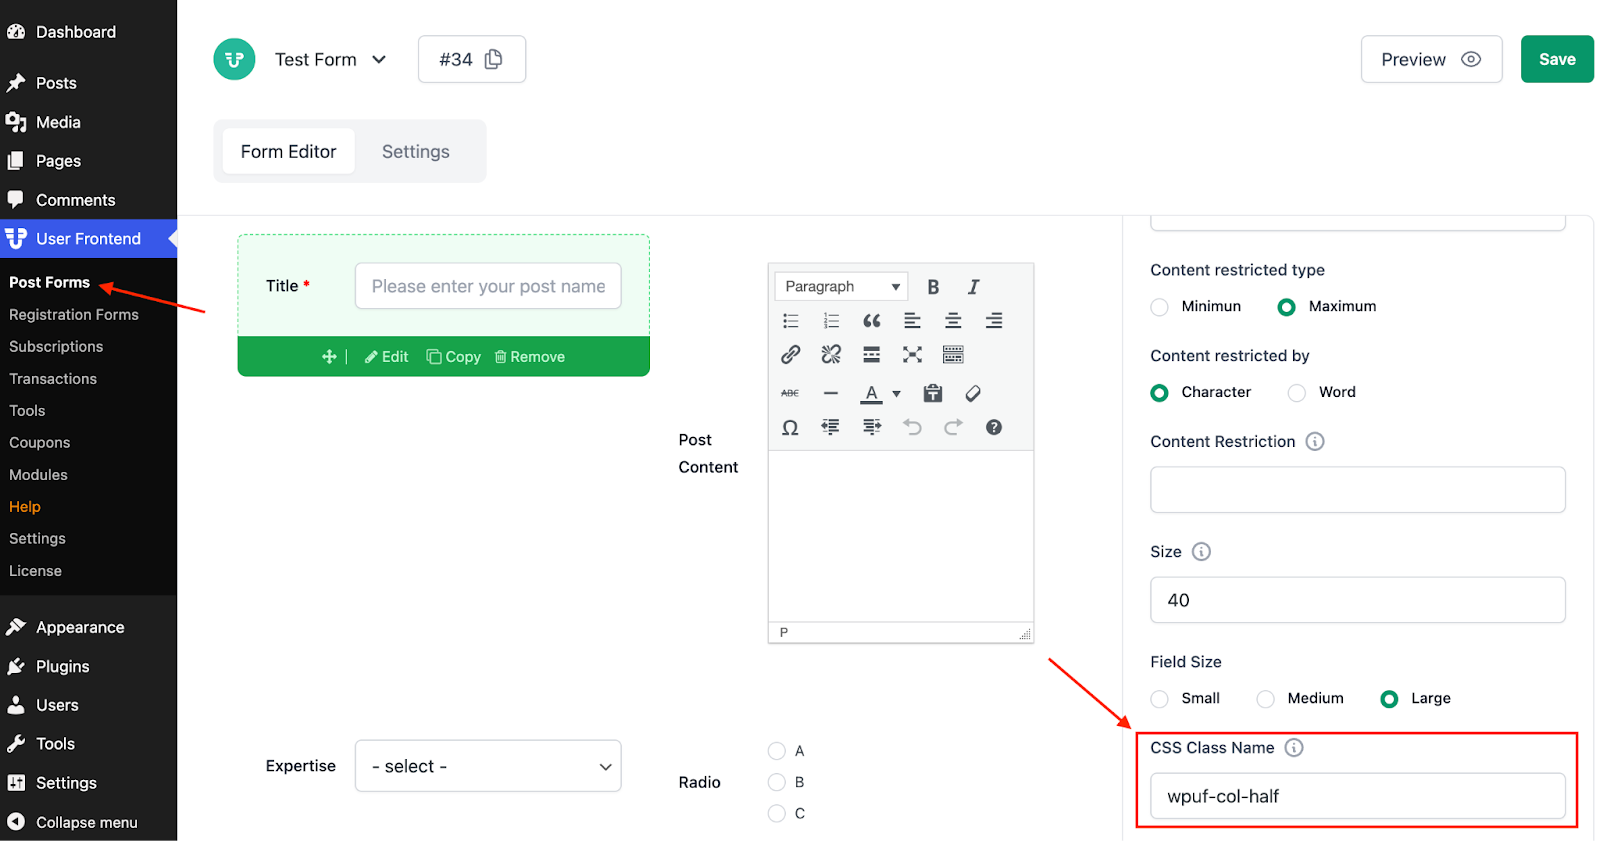
Section titled “For a 2-Column Layout”- Click on the Edit option for the first field you want to place side by side (e.g., Title).
- Go to the Advanced Options tab.
- In the CSS Class Name field, enter: wpuf-col-half.
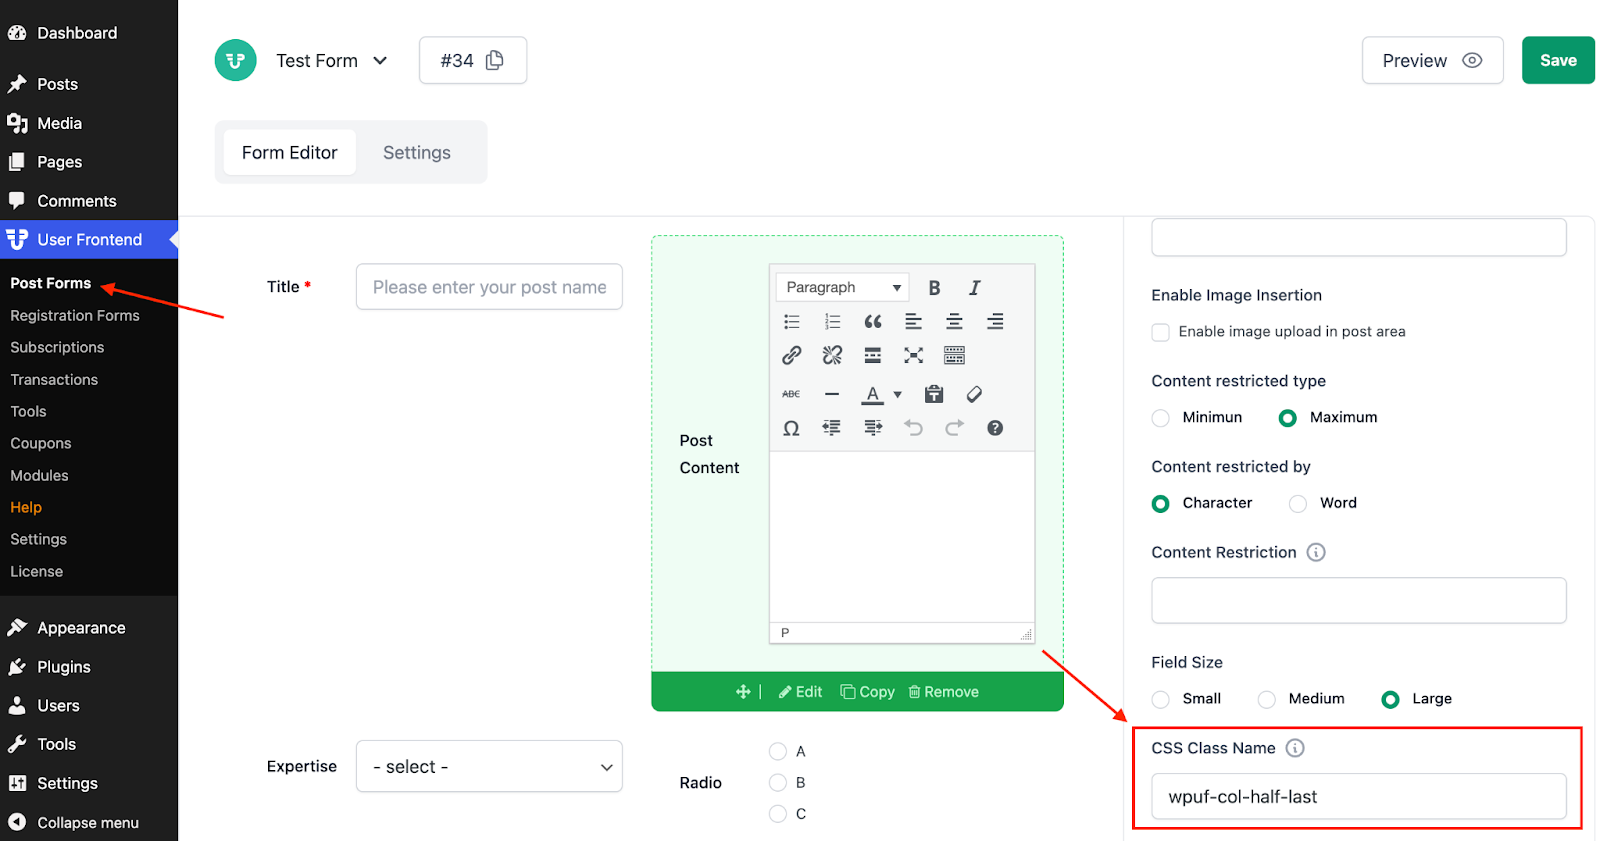
- Edit the second field (e.g., Content), go to Advanced Options, and in the CSS Class Name field, enter: wpuf-col-half-last.
For a 3-Column Layout
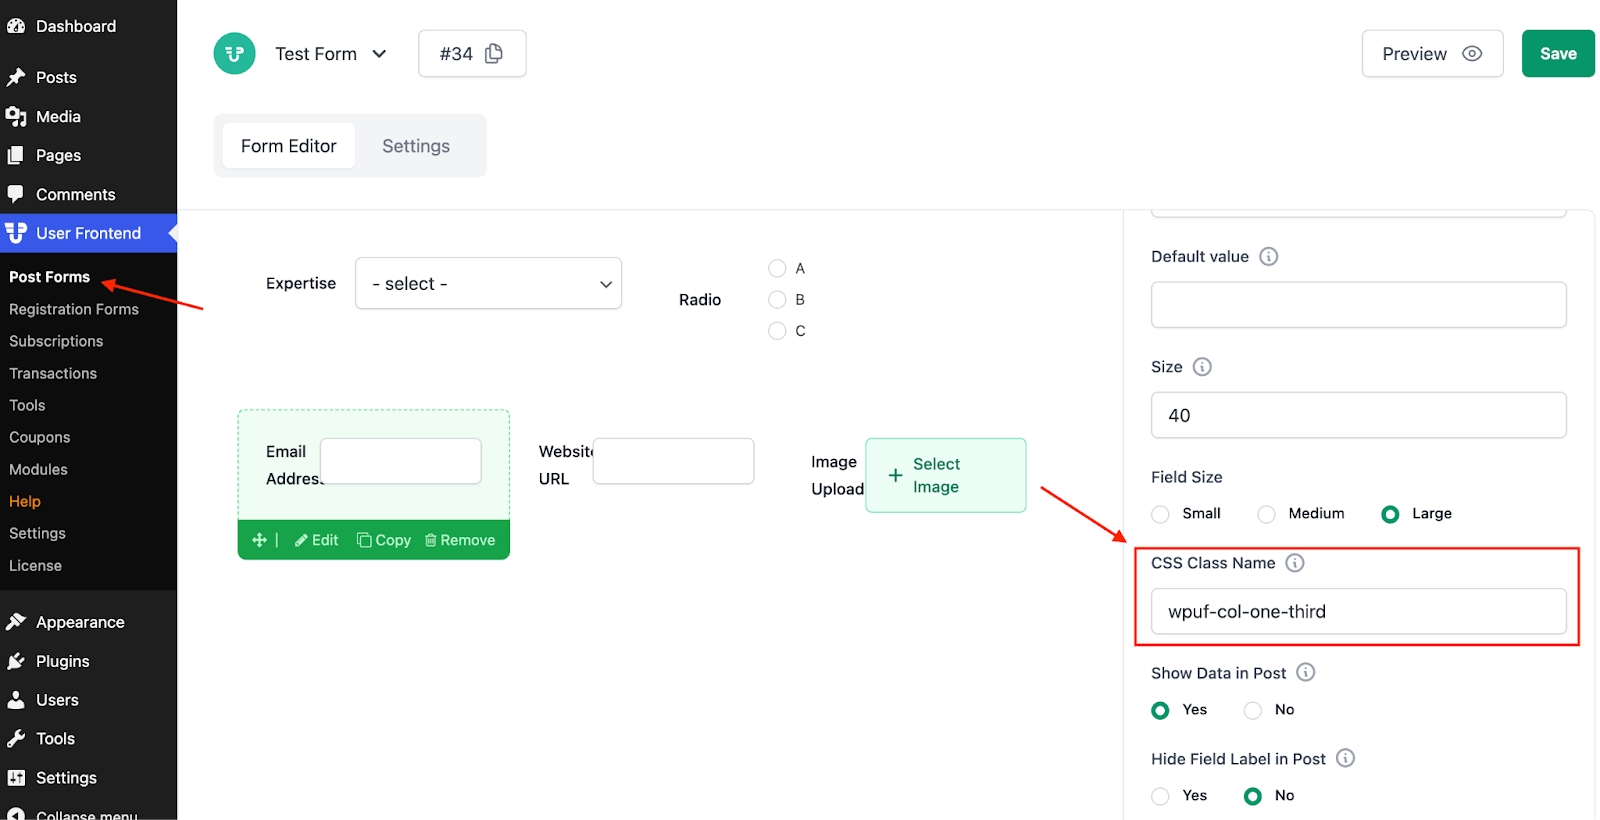
Section titled “For a 3-Column Layout”- Click on the Edit option for the first field you want in a 3-column arrangement (e.g., Email).
- Go to Advanced Options > CSS Class Name, and enter: wpuf-col-one-third.
- Repeat the same step for the second field (e.g., URL), using: wpuf-col-one-third.
- For the last field in the row (e.g., Image Upload), enter: wpuf-col-one-third-last in the CSS Class Name field.
Step 3: Preview and Publish
Section titled “Step 3: Preview and Publish”- As you apply these CSS classes, the changes will be visible in real-time in the form builder.
- Click on the Preview button in the top-right corner to check the layout before publishing.
- Once satisfied, publish your form as usual.
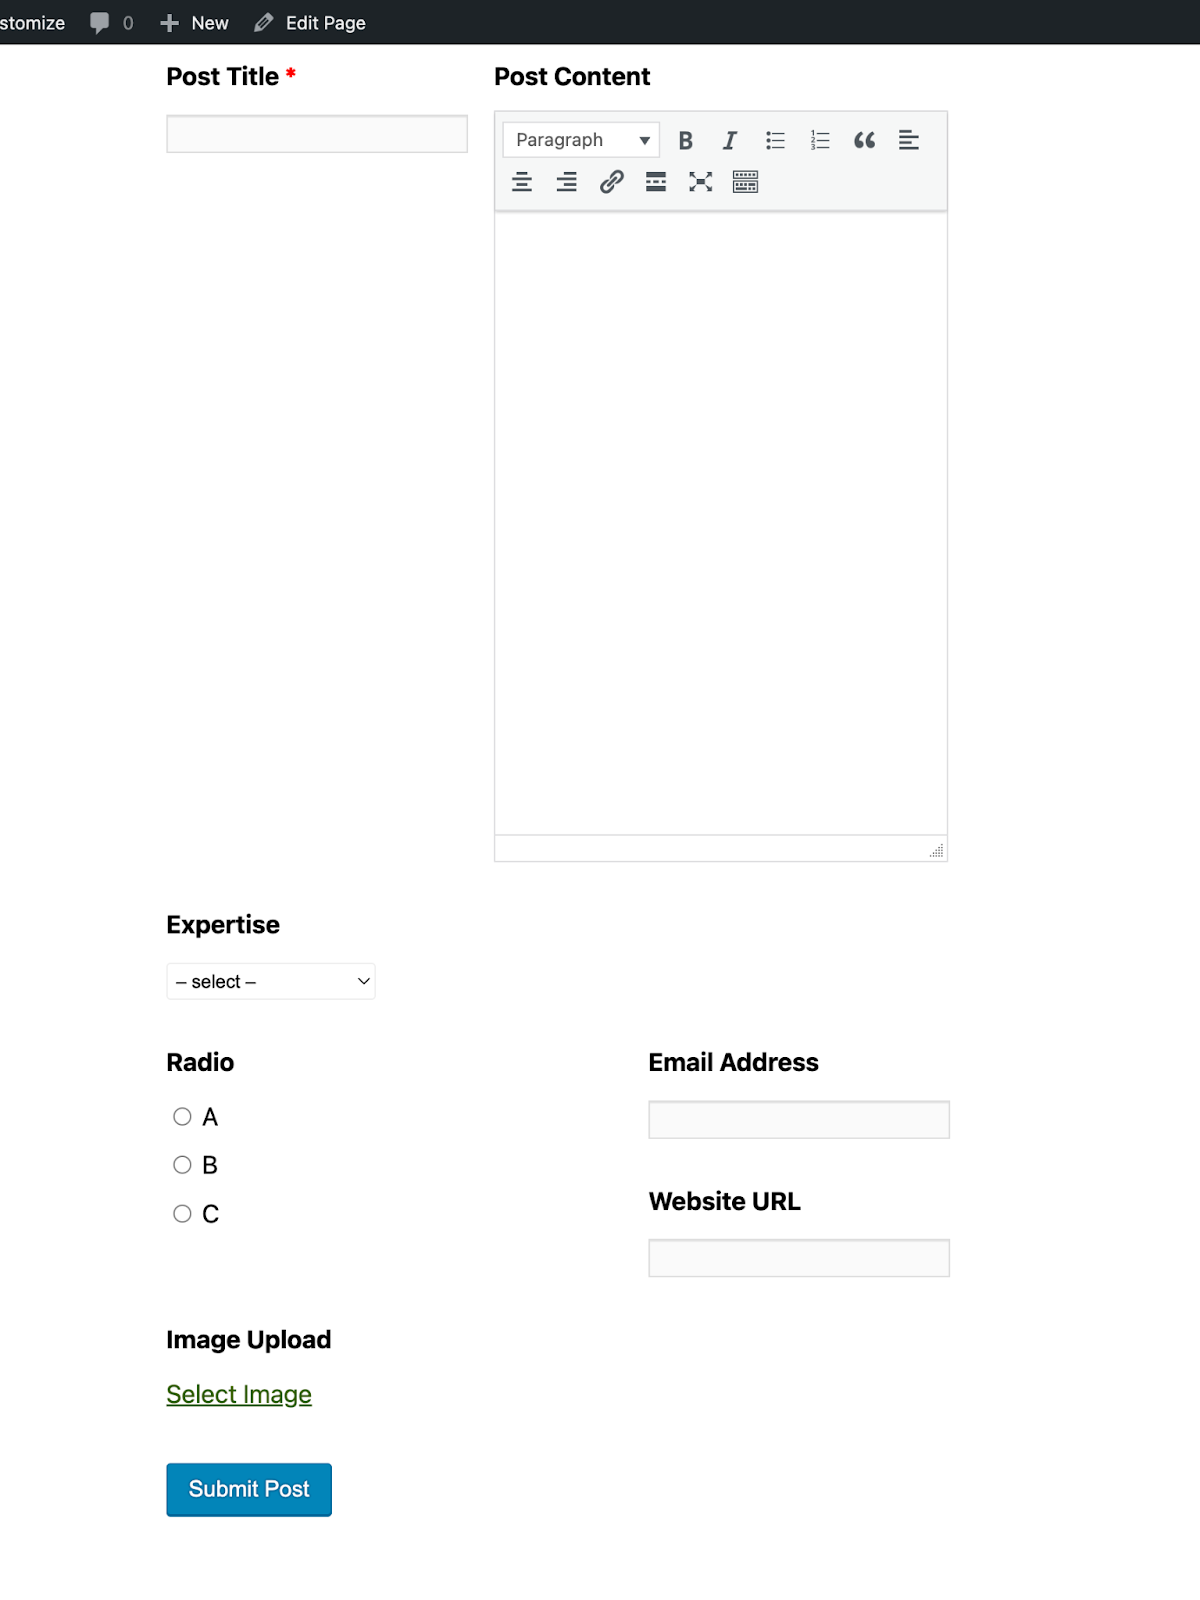
- View the form on the frontend to ensure the fields are correctly aligned in columns
Supported Field Types
Section titled “Supported Field Types”You can apply these multi-column classes to various field types, including:
- Text
- Text Area
- Email Address
- URL
- Radio Buttons
- Drop-downs
- Image Upload
This feature allows you to create well-structured and user-friendly forms effortlessly. Happy form building!