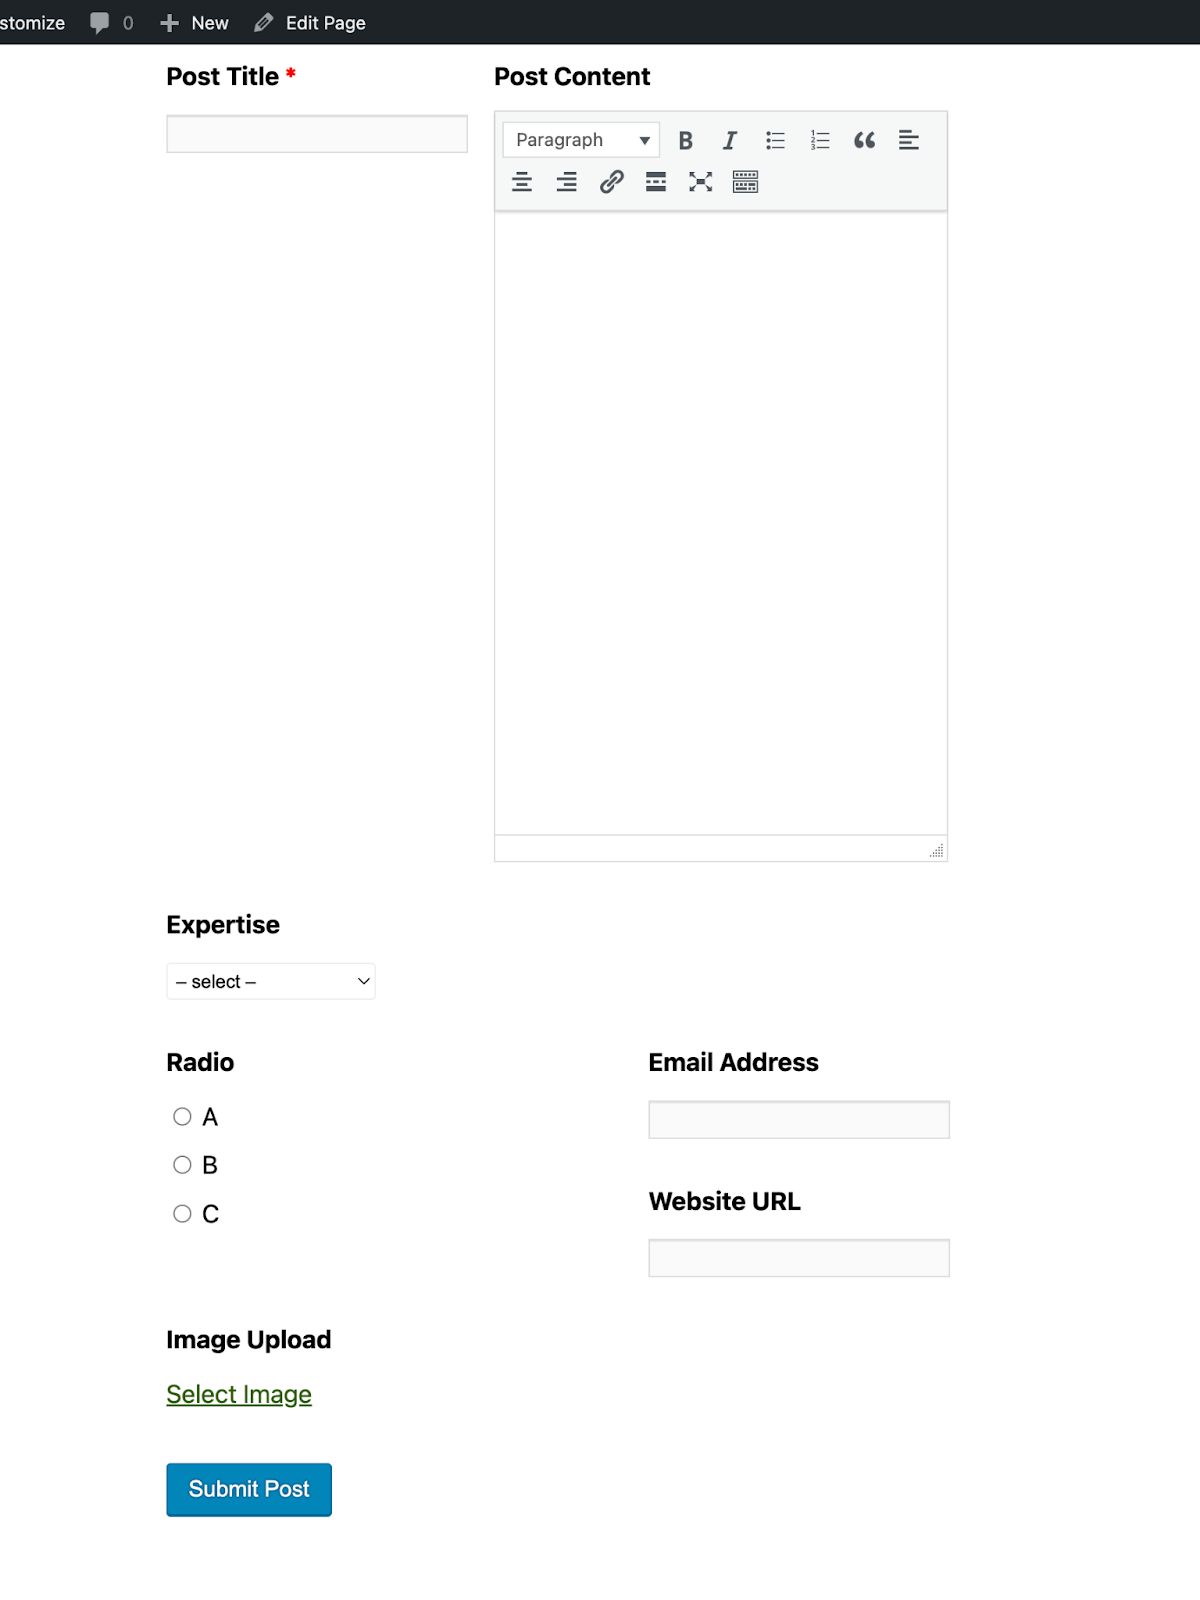

How to Add Multi-Column Classes to Post Forms
With the free version of WP User Frontend, you can enhance the appearance and usability of your forms by organizing form fields into columns. This feature applies to both post submission and registration forms, allowing for a more structured layout.
How to Arrange Form Fields in Columns
Section titled “How to Arrange Form Fields in Columns”Follow these simple steps to arrange your form fields in two or three columns:
Step 1: Open or Create a Form
Section titled “Step 1: Open or Create a Form”- Navigate to WP User Frontend > Post Forms.
- Open an existing form or create a new one.
Step 2: Enable Multi-Column Layout
Section titled “Step 2: Enable Multi-Column Layout”To arrange fields in multiple columns, follow the guidelines below:
For a Two-Column Layout
Section titled “For a Two-Column Layout”- Click the Edit option for the first field you want to position side by side.
- Click on the Advanced Options tab.
- Under CSS Class Name, enter the following class for the first field: wpuf-col-half
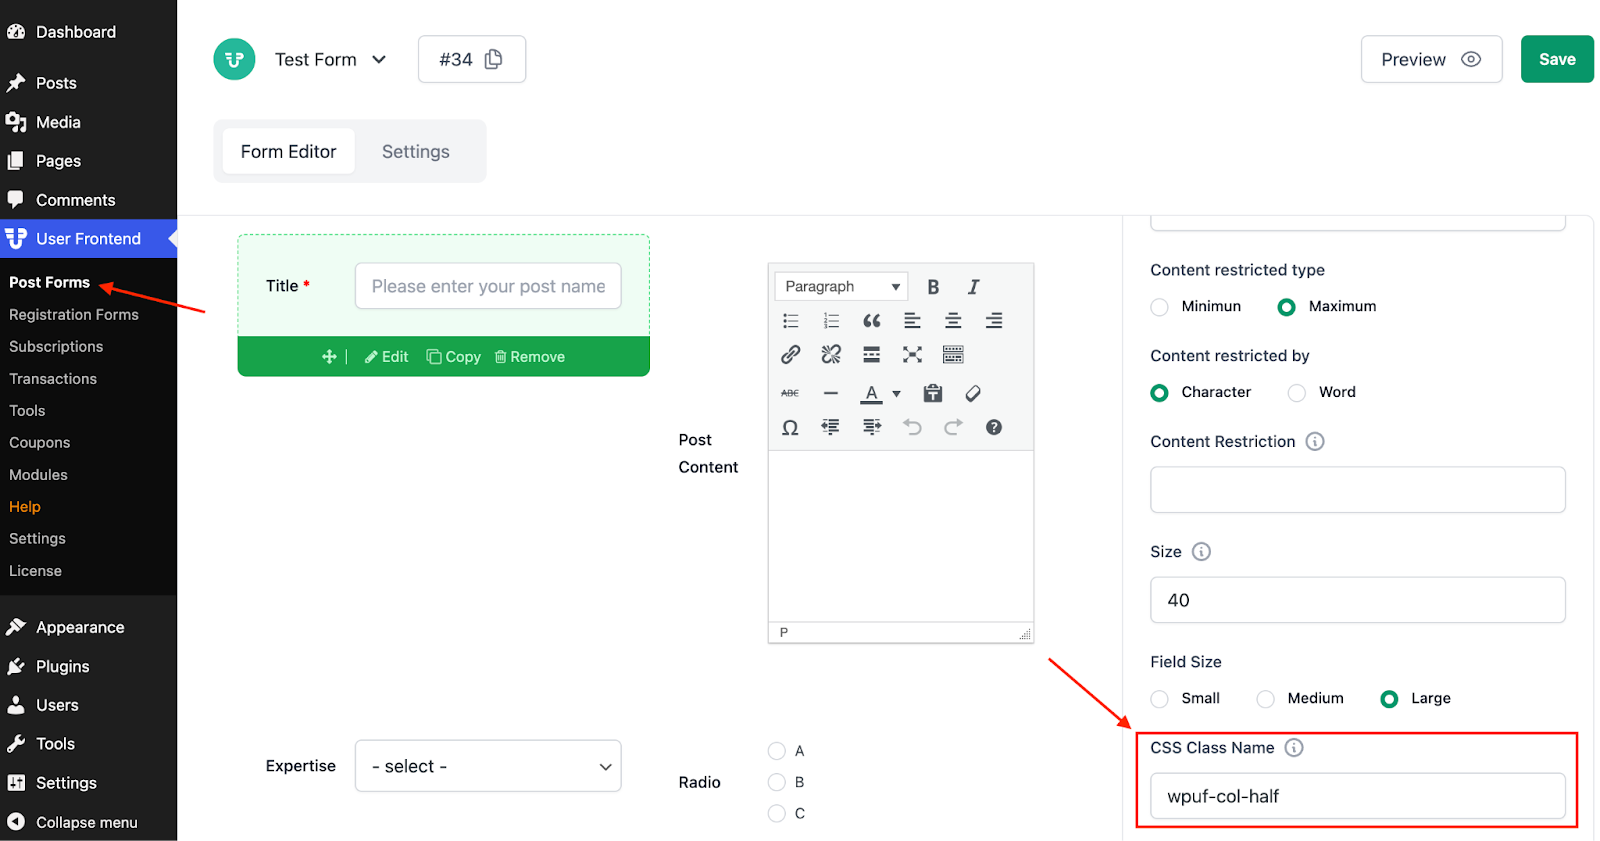
- Now, click the Edit option for the second field.
- Under CSS Class Name, enter the following class: wpuf-col-half-last
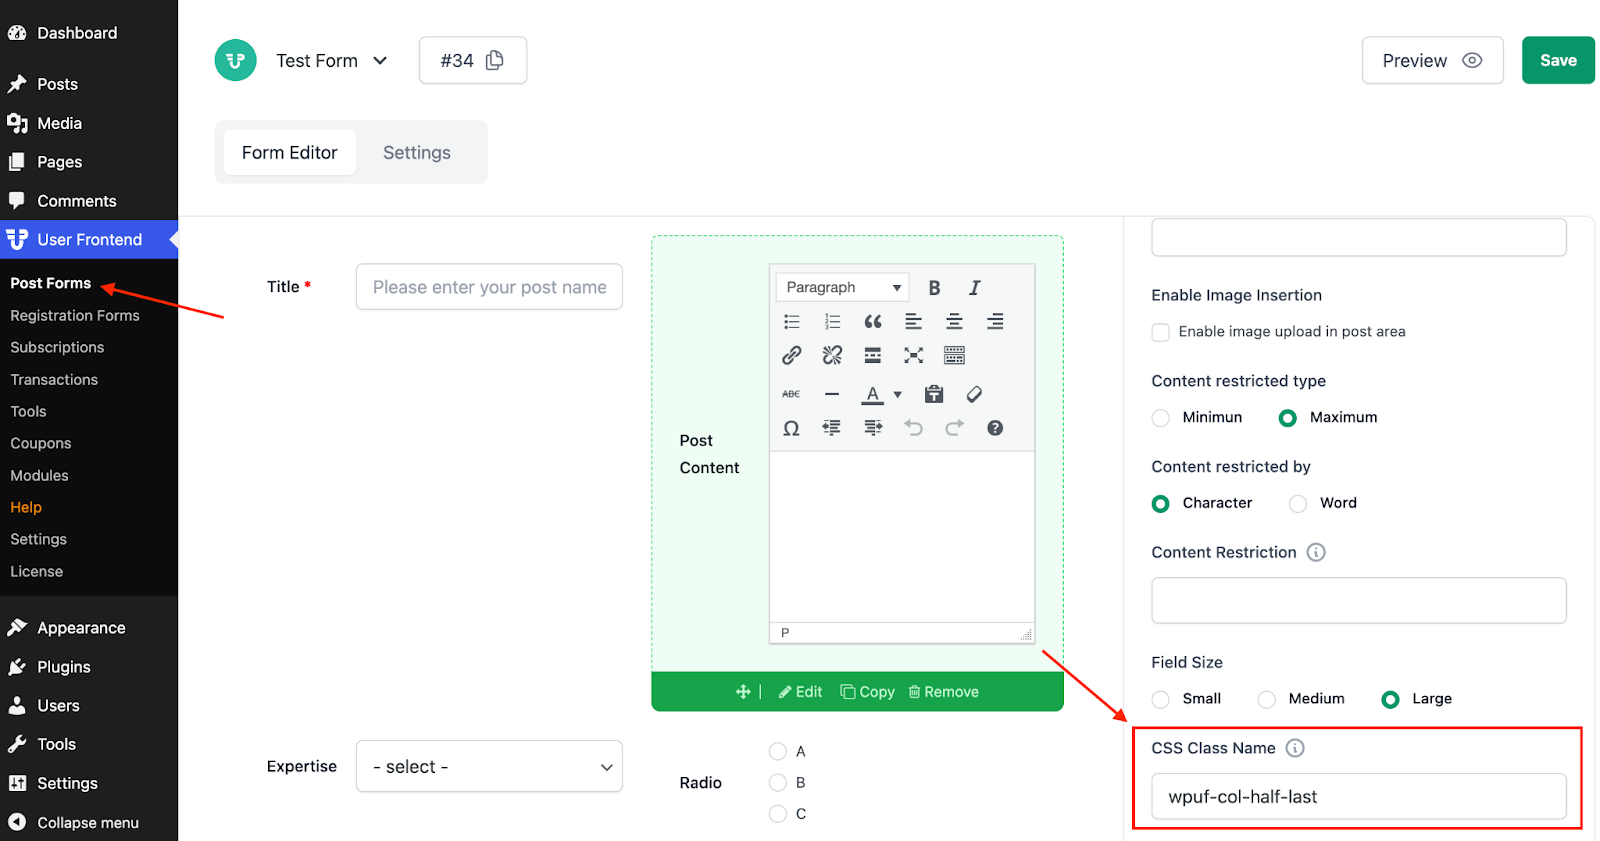
For a Three-Column Layout
Section titled “For a Three-Column Layout”- Click the Edit option for the first two fields.
- Under CSS Class Name, enter the following class for each of them: wpuf-col-one-third
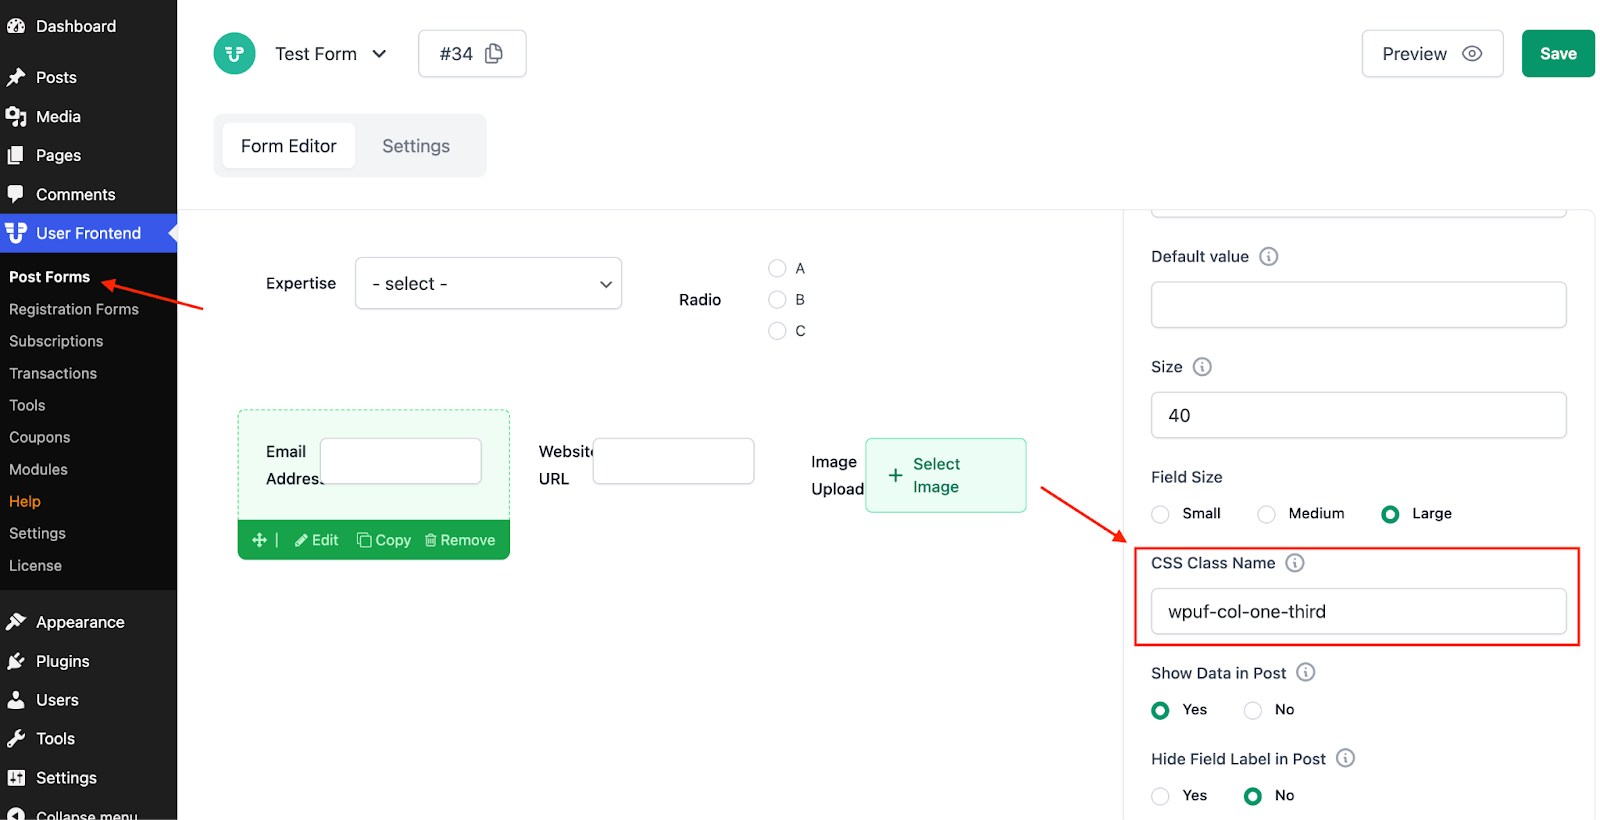
For the third field, enter the following class under CSS Class Name: wpuf-col-one-third-last
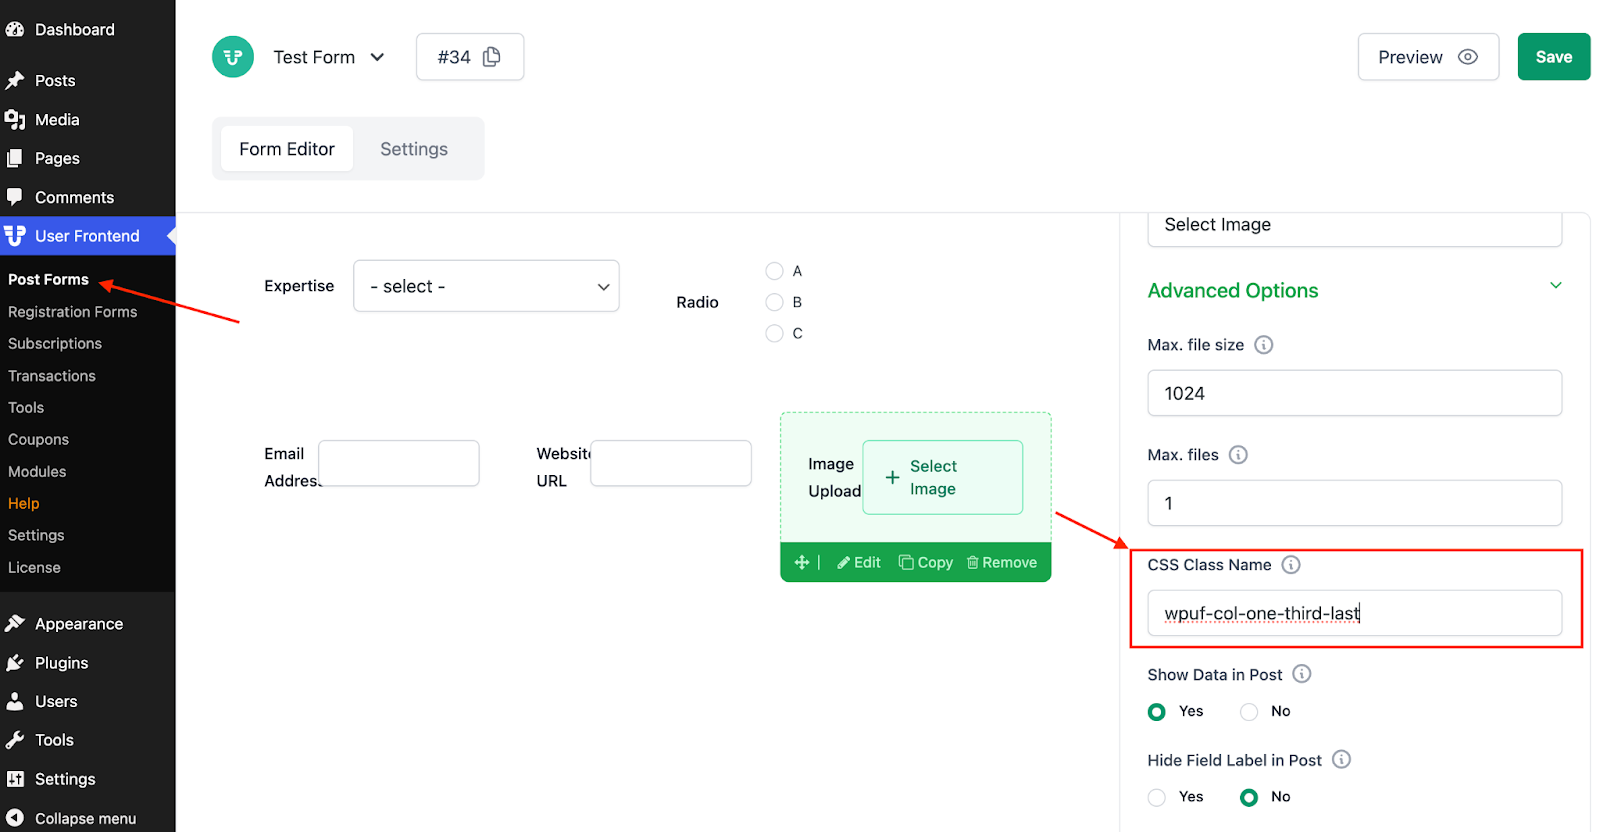
The combination of fields could be different types, like Text, Text Area, Names, Email Address, URL, Radio, Drop-downs, and any other.
As you type these class names, you'll view the changes in real time in the form builder. You can also view the published version using the Preview option located on the top-right of the form.
Step 3: Preview and Publish:
Section titled “Step 3: Preview and Publish:”As you apply the class names, you will see the changes in real time in the form builder.
Section titled “As you apply the class names, you will see the changes in real time in the form builder.”- Click the Preview button at the top-right corner to review the layout before publishing.
- Once satisfied, publish your form as usual.
Frontend View
Section titled “Frontend View”